Few riders would argue against the importance of having appropriate lighting on a motorcycle. It isn’t just the fact that you need to be able to see if you are out at night, adequate lighting also ensure other users of the road such as pedestrians, cyclists and motorists know you are coming way before you get anywhere near them.
So, how do you safeguard against lighting failures on your machine? Here is a quick guide to explain all about lighting on motorbikes.
Types of lighting on a bike
Headlights are not the only bulbs on your two-wheeler that you need to worry about. Equally important are sidelights, indicators, number plate lights as well as tail and stop lights.
If you look at the light bulbs on your bike, you will notice some numbers printed on each one. For example, you might see H1, H3 or H4 on the bulb for your headlights. You might find numbers 501 or 233 printed on your sidelights. The list goes on and on but the important thing is that these numbers are what you need to note when finding replacement bulbs.
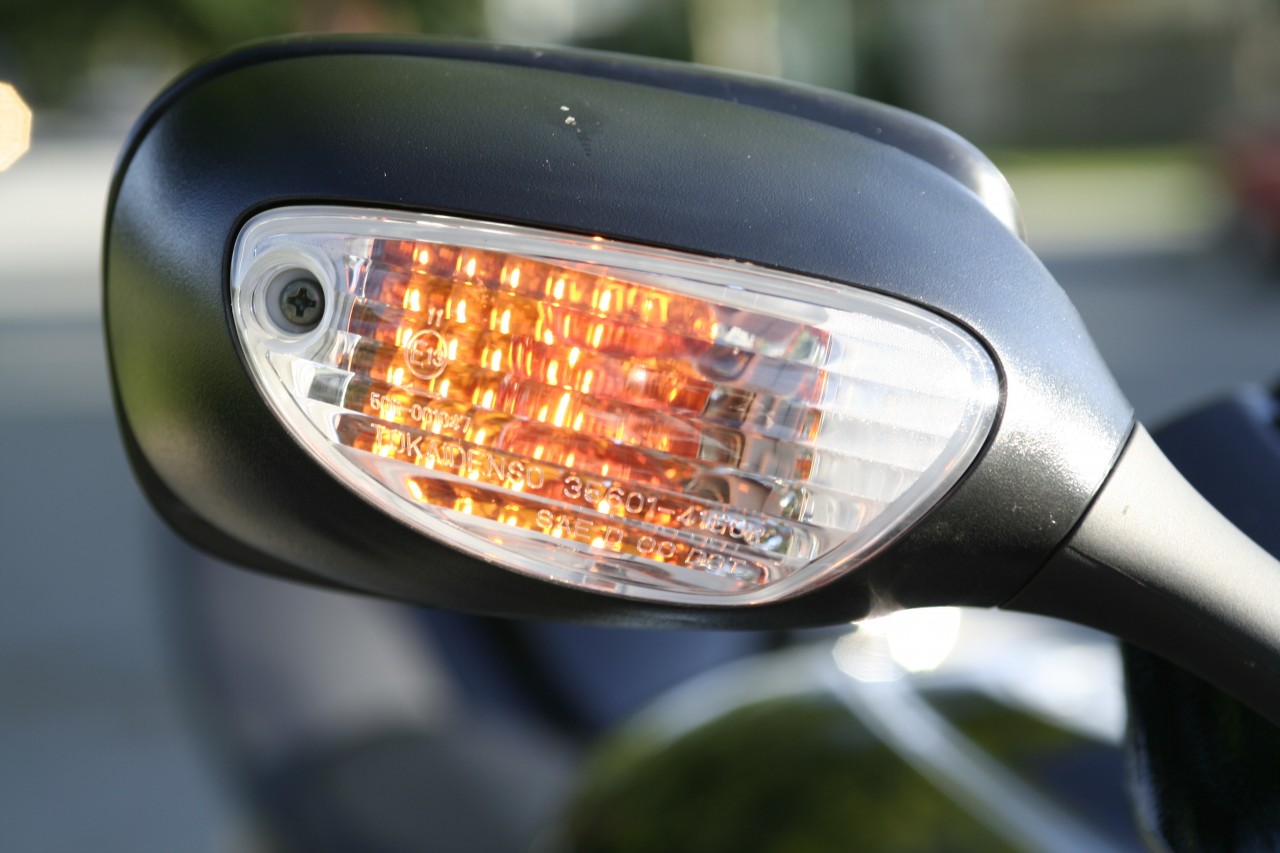
Diagnosing lighting issues
Some modern bikes will give you some sort of a signal to let you know that a bulb has blown. But if your machine doesn’t do that, then it really is up to you to do it the old fashioned way and go through your lights on a regular basis.
The exception to this is when your indicator bulbs have blown. When this happens, the electric circuit actually changes, and you will notice the indicator icon on your speed dial flashing at a much faster speed. This is your call to replace your indicator bulbs.
Accessing the bulbs on your bike
When it comes to replacing lights on your bike, half the battle is won if you can work out how to access the bulbs.
Number plate lights – starting with the easiest bulb to locate, number plate bulbs can usually be found by simply removing the light casing above the plate. You will either need to unclip the casing or take out the screws that hold it in place.
Indicator lights – these are often just twist and locked into place, so simply turn anti-clockwise to remove the bulb holder.
Tail and brake lights – rear light clusters are normally screwed on, so look at the back of the bike to see which screws to undo to access those clusters. If you have a modern bike, you might need to check under the rear seat for access to these lights.
Front headlight – depending on your particular bike, you will either be able to locate the headlight bulb underneath the speedometer or you may need to remove the front fairing to access the light cluster.
Sidelights – removing sidelight bulbs is easy once you have located the headlight bulb, as these are located just below it.
Don’t touch the glass!
Replacing the bulbs on your bike is generally an easy task, but one precaution to bear in mind is that you must not touch any part of the glass on the new bulb as the heat will centre on the spots you have touched and cause it to blow.
Just as important as working lights, you should also ensure you have appropriate insurance for your motorbike. Devitt has been a specialist in motorbike insurance since 1936 and they offer a range of products to suit your needs.
Remember, lighting problems cause accidents are often the reason for failed MOTs, so make sure you check your lights and replace them as necessary!